Food Friday

Food Friday: Sprouting 101

Happy Friday fellow health nuts! It's the long weekend! Im off to celebrate a beloved friend's wedding this weekend and it is going to be beautiful. What are you getting up to?

Lately I have been experimenting with new food prep techniques and making a lot of whole foods myself. What a thrill when you know exactly how your food is made/prepared, hence know exactly what you are putting in your body. I just recently started sprouting because of the ease and the nutritional benefits. Thanks to Costal Healing and Whole Life Nutrition for the inspiration!

Why sprouts?

There are several reasons why choosing to make your own sprouts is beneficial.

  • First of all it is very easy and cheap! You just have to remember to rinse them a couple times a day. Having an at home garden makes me think my green thumb is improving. :)
  • They are very nutritious. Since beans sprout from just adding water, they are packed full of important nutrients that the plant will need in its initial few days. Therefore they are very nutrient dense, with little calories. Other examples of nutrient dense foods are liver, eggs, lamb, leafy greens (especially baby greens).
  • Sprouts have many health benefits. Because of their packed storehouse of nutrients, including vitamins, minerals, antioxidants, enzymes and fibre they can help battle conditions such as digestive and bowel issues, blood pressure and cholesterol issues, a poor immune system, skin issues...you name it!
  • Broccoli sprouts contain sulforaphane. This is a powerful antioxidant and detoxification chemical. These sprouts can take a little longer to start sprouting so be patient. 

What you will need:

  • 1-L wide-mouth mason jar - You can pick a pack up at Canadian Tire, find at thrift stores or buy a couple at Michaels. 
  • Plastic needlework canvas - You can find this at Michaels for 99 cents (or any craft store). The finer canvas works best for smaller sprouting seeds. (Sprouting lids are available online for a cost, but it is very easy to make your own.)
  • Sprouting seeds - Mung and alfalfa are typically the easiest to start with but broccoli sprouts are even more nutritious. You can find seeds at places like Halifax Seed. 

How to sprout:

sprouting101dr.karen.jpg
sprouting101-2dr.karen.jpg
  • To make the sprouting lid, trace the metal lid on the needlework canvas. Cut the circle out and insert into the mason jar lid ring (without the inner circle). Voila!
  • Place 2 tbsp of sprouting seeds in the mason jar. Cover with a few inches of water, screw lid on, and let soak overnight in a warm dark place. After 6-10 hours, drain the water. 
  • Rinse the seeds with water twice a day, draining the jar completely each time. Store in a warm dark place, tilted at an angle in a bowl, so any excess water drains out. The sprouts should be moist but not sitting in water. 
  • Once the sprouts have grown a few centimeters and have defined yellow leaves, place the jar in a bright place to be exposed to sunlight to green. Continue to rinse to ensure they do not dry out. 
  • Store sprouts in the refrigerator for up to a week. Enjoy on salads, sandwiches or as a snack. 

Any other at home garden tips?

In health & happiness,

Dr. Karen

(Photo credit: www.boulderlocavore.com)

Food Friday: Summer Tomato Harvest Soup

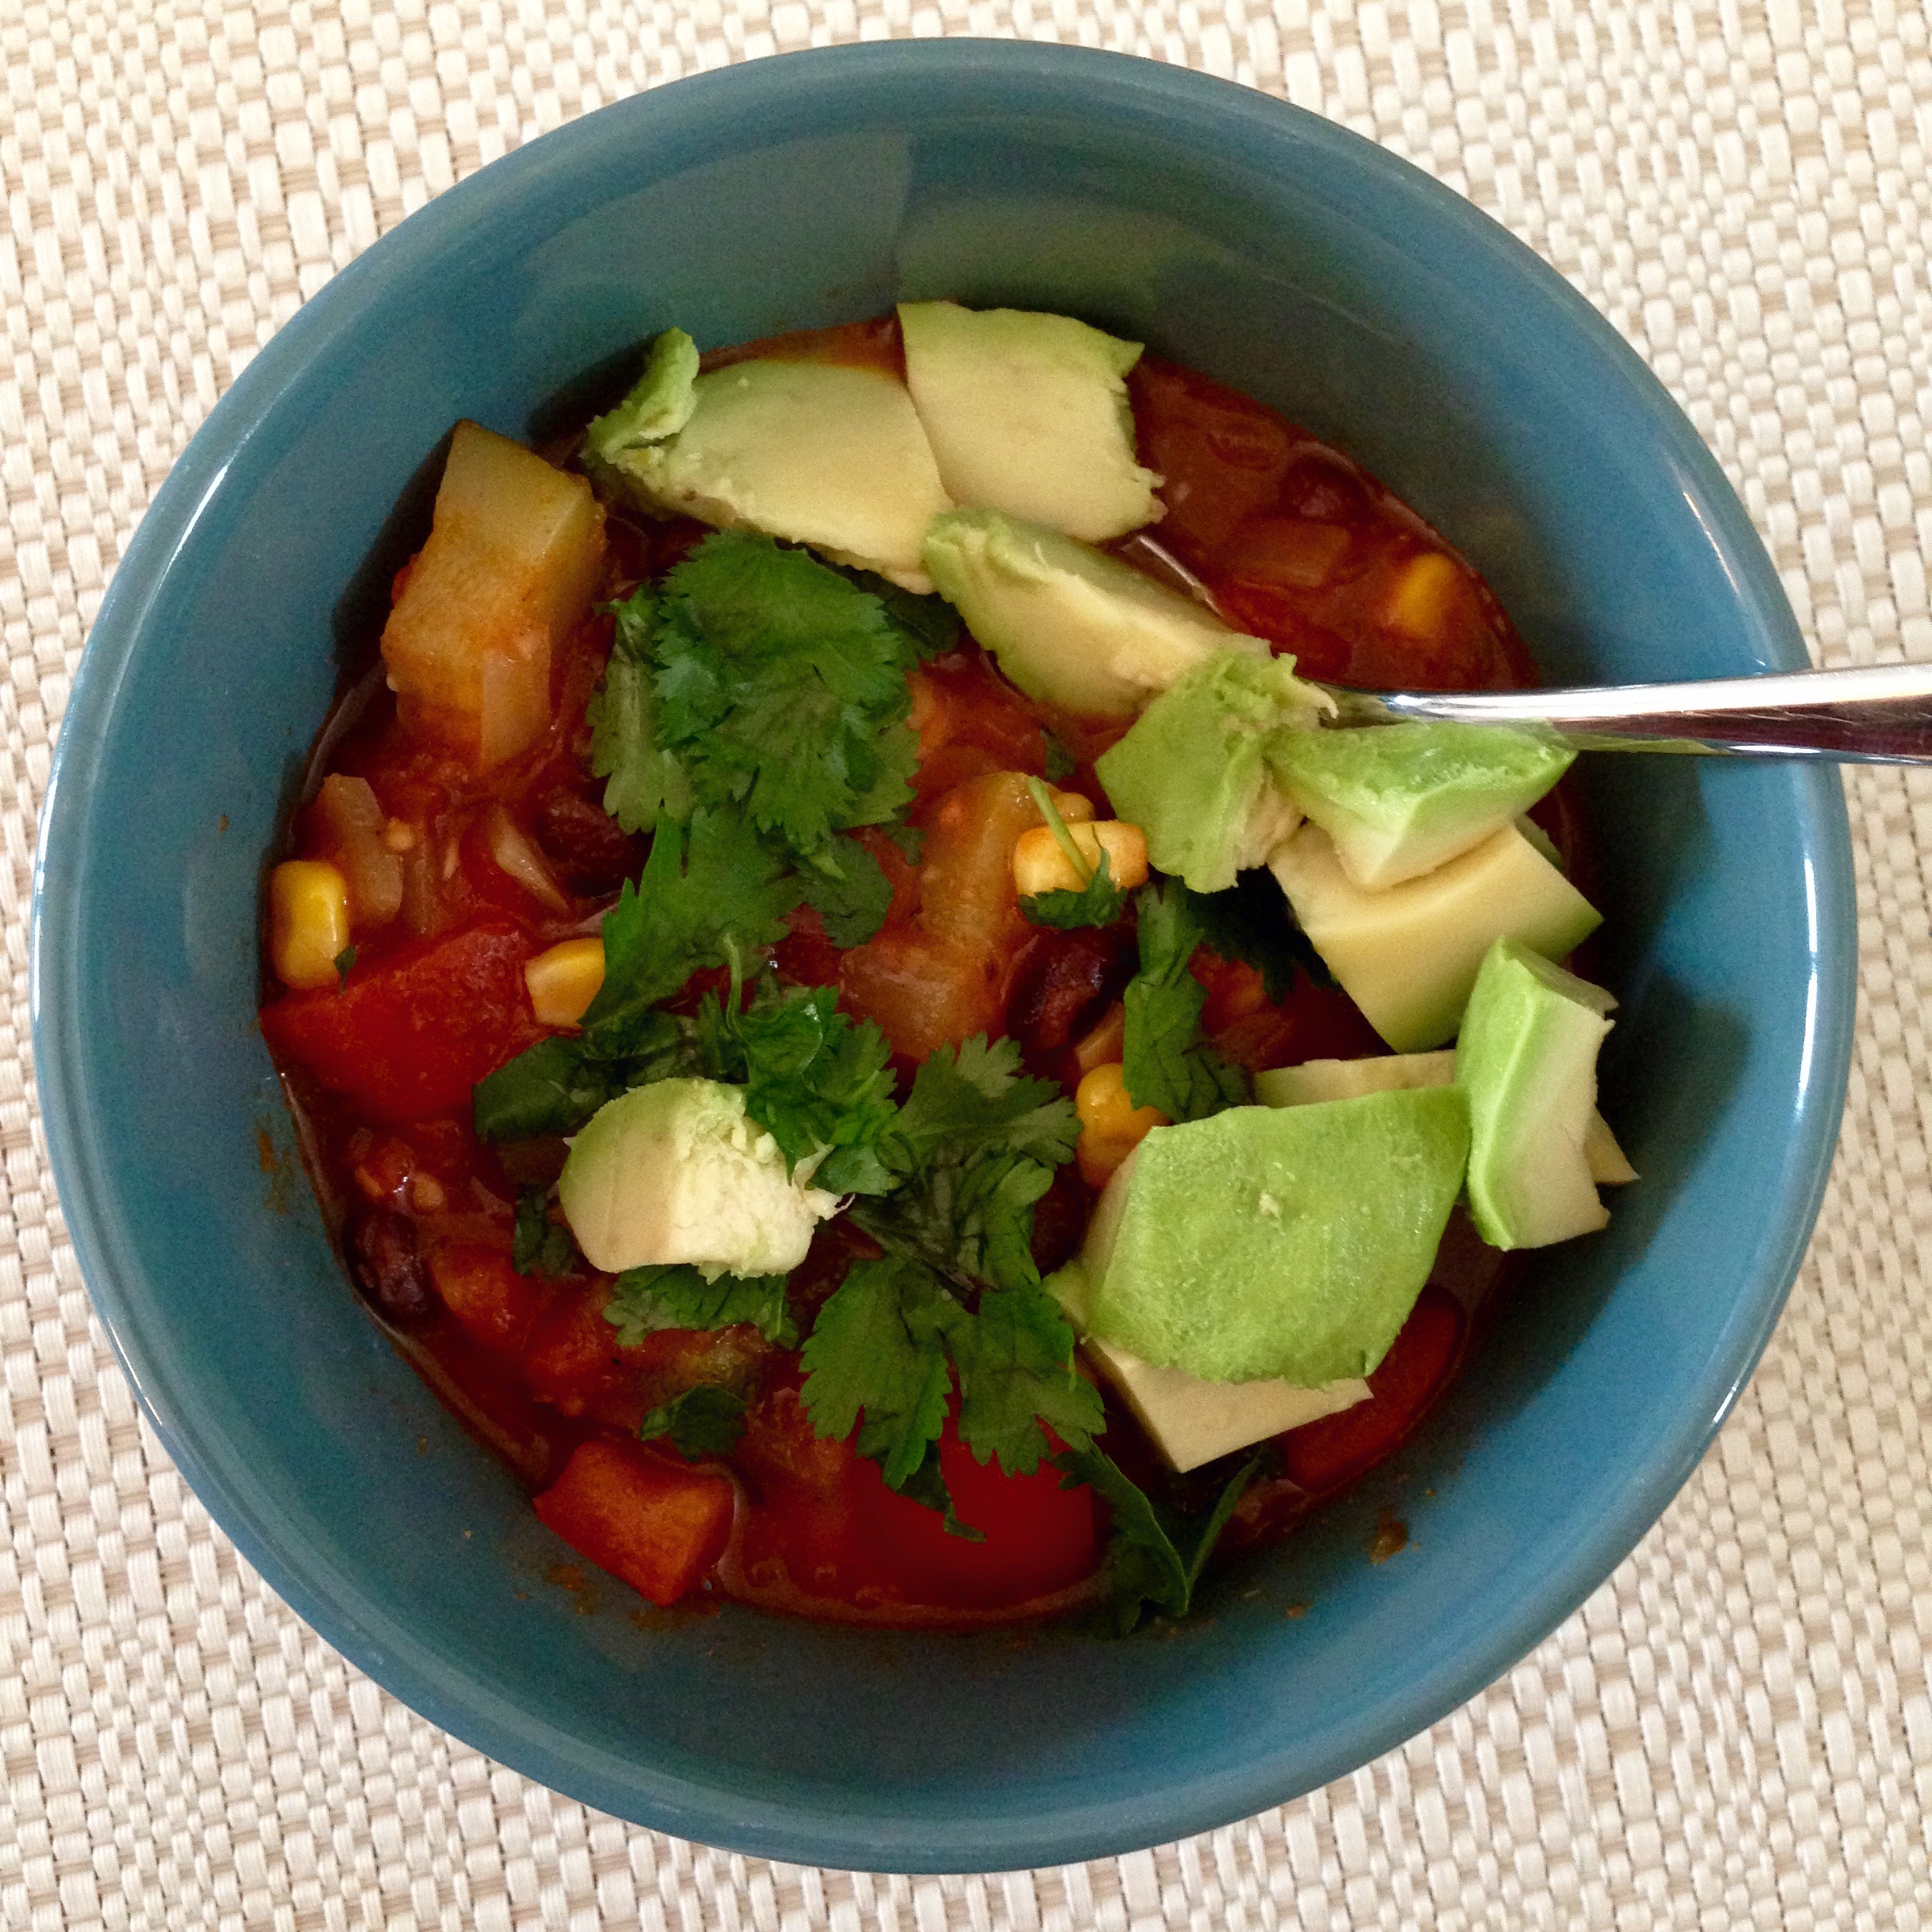
Zucchini galore these days! There are many ways to eat them this summer - add them to bread, muffins, stir-fry, spiralize for noodles or add them to a soup. I am a big fan of summer soups, since they are quick nutritious meals for lunches at the office but also warming, since our bodies don't recognize its summer when we sit in the office all week. This soup is similar to chili, but full of summer veggies you can find at your local market. Steer clear if you are on an inflammation diet, or suffer from rheumatoid arthritis, since it contains nightshade vegetables, which can be inflammatory. This recipe is from one of my favourite cookbooks OhSheGlows. 

Ingredients:

Tomatosoup-Dr.Karen
  • 1 tbsp extra-virgin olive oil
  • 1 yellow onion, diced
  • 3 large cloves garlic
  • freshly ground black pepper
  • 1 large red bell pepper, diced
  • 1 jalapeno, seeded, if desired, and diced (optional but recommended)
  • kernels from 2 ears fresh corn, or 1 1/2 cups frozen corn kernels 
  • 1 medium zucchini, chopped
  • 1 (24 oz/680g) jar or can crushed tomatoes (I crushed a can of whole San Rem tomatoes myself)
  • 3 cups vegetable broth
  • 3 tsp ground cumin
  • 1/2 tsp chili powder
  • 1/4 tsp cayenne pepper
  • 1 tsp sea salt, or to taste
  • 1 (15 oz/425g) can black beans, drained and rinsed
  • Optional toppings - sliced avocado, fresh lime juice, cilantro

Recipe:

Serves 4; Prep time - 20 minutes; Cook time - 30 minutes

  1. In a large saucepan, heat the oil over medium heat. Add the onion and garlic and saute for about 5 minutes. Season with salt and pepper.
  2. Stir in the bell pepper, jalapeño, corn kernels, and zucchini. Raise the heat to medium-high and salute for 10 minutes more.
  3. Add the crushed tomatoes, broth, cumin, chili powder, and cayenne and stir well. Season with salt and pepper.
  4. Bring the soup to a low boil and reduce the heat to medium. Simmer, uncovered, for 10-15 minutes, until the vegetables are tender. Stir in the black beans and simmer for 2 minutes more.
  5. Scoop the soup into bowls and garnish with your toppings of choice (mine are avocado, lime juice, and lots of cilantro - good for the liver!) 
  6. Enjoy!

Do you have any favourite summer soup recipes to share? 

In health & happiness,

Dr. Karen

Food Friday: Turkey-Sweet Potato Hash

The 2015 Spring Cleanse we are doing at the clinic is weeks away (May 25th-June 7th), so I wanted to share a taste of the type of recipes I will be sharing with the group. Spring is a great time to do a gentle cleanse or reboot. In chinese medicine, spring is the time of the liver, and the liver is responsible for cleansing and detoxing the body. By eliminating the more inflammatory foods, such as gluten, dairy and sugar, and supporting the liver to work optimally, we will begin to feel more energized, less bloated, see clearer skin and shed some winter weight. 

This recipe comes from the authors of The Whole Life Nutrition Cookbook, and is suggested during an elimination diet for breakfast. The ground turkey provides adequate morning protein for the day ahead, and is a less inflammatory meat. Sweet potatoes are also anti-inflammatory, with antioxidants and help balance blood sugar. Great for a detox and taste delicious. You can make a big batch of this recipe ahead of time, for a quick, nutritious breakfast. I like adding a side of sauteed greens, such as kale. I added fried plantains one morning to curb my craving as well! 

(If you want to join in on the cleanse, check out my facebook page here, for more information.)

Ingredients: 

  • 1 1/2 pounds sweet potatoes, peeled and cut into chunks
  • 3-4 green onions, cut into large pieces
  • 2 tbsp olive oil
  • 3/4 pound ground organic turkey
  • 1/2-1 tsp dried marjoram (can substitute half the amount of oregano, if needed)
  • 1/2 tsp Herbamare (or sea salt)
  • freshly ground black pepper
  • 3-4 tbsp thinly sliced fresh sage leaves - garnish
  • 2-3 green onions, thinly sliced - garnish

Recipe:

  1. Place the sweet potatoes and green onions into a food processor/blender. Pulse/process until chopped into small pieces, being careful not to over process.
  2. Heat a 12-inch cast iron skillet over medium heat. Add the oil. Saute sweet potatoes and green onions for 10 to 12 minutes then push them to the side of the pan. Add the ground turkey to the empty side of the pan, sprinkle with marjoram, Herbamare, and pepper. Saute for about 5 minutes or until cooked. Add a dash more olive oil if needed. 
  3. Stir the sweet potatoes and turkey together; saute a few minutes more. Taste and adjust seasonings if necessary. Sprinkle with fresh sage and green onions. Serve and enjoy! 

In health & happiness,

Dr. Karen

Food Friday: Peanut butter cups

HALF EATEN CUP...I JUST COULDN'T WAIT :) 

HALF EATEN CUP...I JUST COULDN'T WAIT :) 

Around Easter time, I am tempted just like many of us, with mini-eggs and chocolate bunnies! I was able to stay clear for the most part this year. However, my sister was here visiting for the holiday so I wanted to have some Easter treat for us to enjoy. These peanut butter cups were the perfect indulgence, made with only a few all natural ingredients and very easy to make. They were introduced to me by a great friend and colleague and I am happy to keep spreading the word. 

Ingredients:

  • 1 1/3 cups vegan chocolate chips, melted (I use camino fair trade chips; mixed with about 1 tbsp coconut oil)
  • 3/4 cup natural peanut butter
  • 1/4 cup pure maple syrup 
  • 2 tbsp nutritional yeast (gives it the savoury flavour you keep coming back for!)

Recipe:

  • Line 12 muffin cups with paper muffin liners.
  • Pour about a teaspoon of melted chocolate into the bottom of each muffin liner and tap the tin on the counter a couple of times to smooth out. Make sure the chocolate is touching all sides of the liner or your filling will leak out the bottom. Pop the muffin tin in the freezer to set while you prepare the filling (approx 10 minutes).
  • In a small bowl, combine the peanut butter, maple syrup and nutritional yeast. Once the chocolate on the bottom is set, remove the tin from the freezer and divide the peanut butter mixture evenly between the 12 cups, smoothing the peanut butter out so it touches all sides of the liner. It doesn't have to be perfect; the rest of the chocolate will fill in the gaps. 
  • Divide the remaining melted chocolate evenly between the 12 cups, tapping on the counter again to smooth out the chocolate. Place in the freezer until it is set. Once set, remove the muffin liners and store in the refrigerator (or freezer).

I hope you enjoy them just as much as I do :)

In health and happiness, 

Dr. Karen