Food Friday

Food Friday: No Bake Granola Bars - 2 Ways

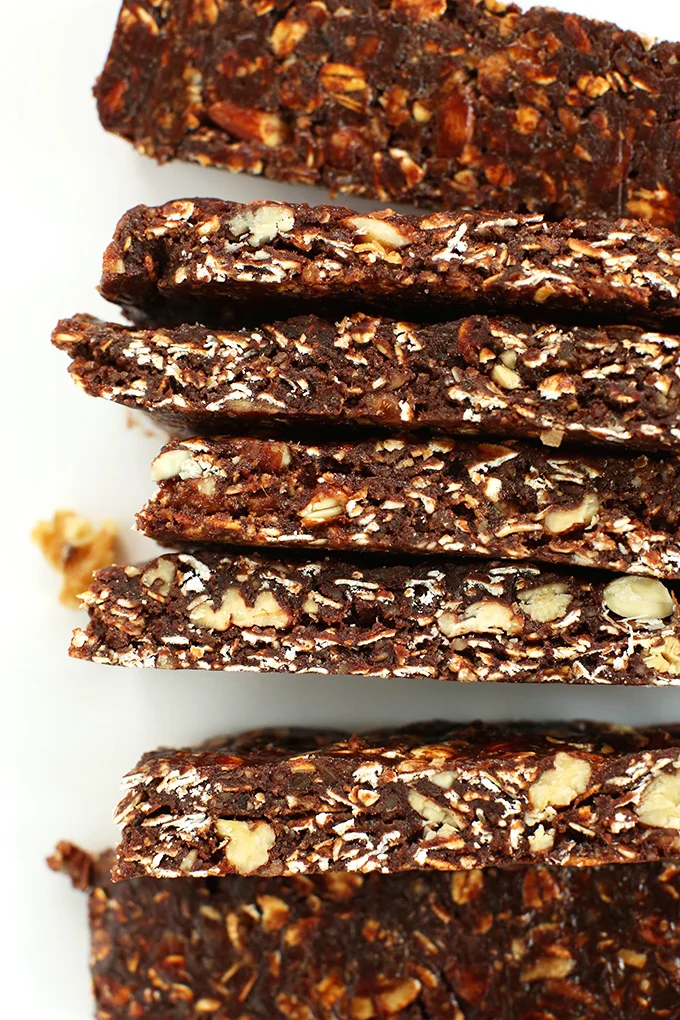
With this summer heat, the last thing you want to do turn on your oven. So what better way to whip up a nourishing and delicious snack than with dates and a freezer! No bake granola bars can be made several ways depending on the flavours you are craving. Here are 2 different options that I really enjoy. I’ll grab one of these out of the freezer in the morning for breakfast if I am running late or pack one in my lunch bag for a satisfying snack in the afternoon, remembering to pop it in the fridge/freezer at work. 

The dates provide a natural sweetness, are a good source of fibre and are blood building. Be sure to use all natural nut butter to avoid added sugars and to get the right taste. These bars have both protein and good fats from the nuts. Use raw cacao powder for the chocolate bars if you can find it. It is a fantastic superfood packed full of nutrients and antioxidants. 

Chocolate Granola Bars

Ingredients:

  • 1.5 cups dates (soaked for a couple hours)
  • 1/2 cup walnuts
  • 1/2 cup almonds
  • 1/2 cup raw cacao powder/dark cocoa powder 
  • 1.5 cups rolled oats
  • 3/4 dark chocolate chips
  • 1/2 cup almond butter
  • 1/4 cup maple syrup

Directions:

Blend dates, walnuts, almonds and cocoa powder in a food processor. In a large bowl mix that with oats, chocolate chips, almond butter and maple syrup. Pour mixture into a 9x9 baking sheet or loaf pan (depending on the size of granola bars you want) lined with parchment paper and press firmly down. Freeze for 1 or more hours until hardened. Lift from parchment paper and cut into bars or squares. Wrap individually in plastic wrap or wax paper and store in the freezer. 

Maple Granola Bars

Ingredients:

  • 1 cup dates (soaked)
  • 3/4 cup almonds
  • 1.5 cups rolled oats
  • 1/3 cup maple syrup
  • 1/2 cup almond butter

Directions:

Blend dates in a food processor. Add almonds and blend again. Lastly oats, maple syrup and almond butter and blend a third time until it forms a ball. Pour mixture into a 9x9 baking sheet or loaf pan (depending on the size of granola bars you want) lined with parchment paper and press firmly down. Freeze for 1 or more hours until hardened. Lift from parchment paper and cut into bars or squares. Wrap individually in plastic wrap or wax paper and store in the freezer. 

Enjoy!

Do you have a favourite granola bar recipe? Let me know in the comments below.

In health & happiness, 

Dr. Karen 


Food Friday: Pomegranate Chicken Tacos

Are you looking for a quick yet delicious meal that is still healthy? These pomegranate chicken tacos, aside from the wraps, are prepared in a slow cooker so they can be put together quickly when you get home from work! This recipe is great if you are on an elimination diet, avoiding gluten or just looking for a healthy option. They can be even made paleo if you use plantains to make the wraps or use fresh collard greens. 

I have made these tacos using different variations for a wrap and I have to say using homemade wraps makes the meal! You can find the recipe for brown rice tortillas here. It is so simple! I don’t own a tortilla press but using my hands, a rolling pin or a heavy pot to flatten them works just fine with the flour between two pieces of parchment paper. Leftover chicken can be added to lunches with a kale salad or something along those lines. 

Ingredients:

Chicken:

  • 1-1.5 lbs organic or local chicken breast, skinless, boneless
  • 1 cup pure pomegranate juice
  • 1 small onion, halved and cut into half-moons
  • 2 large garlic cloves
  • 1 tbsp extra-virgin olive oil
  • 2 tsp ground cumin
  • 2 tsp sea salt
  • 1/2 tsp freshly ground pepper

Tacos:

  • Brown rice tortillas (recipe here) or collard green leaves 
  • thinly sliced napa cabbage or romaine lettuce
  • sliced avocado
  • thin strips of cucumber
  • mayonnaise (vegan if prepared) 
  • broccoli sprouts (optional)

Directions:

brown rice tortillas.jpg
  1. Before work place all the ingredients of the chicken in a slow cooker. Cover and cook on low for 6 or so hours. Remove the chicken from the slow cooker and place it on a plate or cutting board. Using two forks, shred the chicken then place it back in the slow cooker and mix it into the cooked onions and juices. Let it cook uncovered for 10-15 minutes more. 
  2. During this time, make the tortillas using brown rice flour or almond flour and tapioca flour (I find this works better than arrowroot). Add more tapioca flour until you can easier form a ball of dough. Continue with recipe from here. Be sure to eat when tortillas are still warm to avoid them breaking too much. 
  3. To assemble the tacos, spread a small amount of mayonnaise on the tortilla. Place a scoop of the shredded chicken into the centre of each tortilla, then add a small handful of greens, a few slices of avocado, a small handful of cucumber and a tbsp broccoli sprouts. Fold in half and enjoy! It gets a little juicy so watch out 😃 

Let me know what you think!

In health & happiness, 

Dr. Karen

Food Friday: Gut Healing Gummies

No fancy molds for me :)

No fancy molds for me :)

This past week I spoke to a small group of Holistic Nutritionists in Halifax all about liver health and the key aspects of detoxification (Side note - Join me for my Annual Spring Cleanse at the end of April online!). At the beginning of the talk Lisa mentioned what the top 5 health trends are predicted to be in 2017 and gummies were on the list! No, not the sugary gummy bears or jujubes unfortunately. I am assuming they mean gut healing gummies you can easily make yourself and that I have been making for awhile now. This recipe is adapted from a great website autoimmunewellness.com

If you've had your ears open to talk about gut health lately you no doubt have heard about the importance of bone broth. It is filled with important nutrients to heal your gut lining and decrease inflammation such as minerals like calcium, magnesium, as well as gelatin and collagen. Taking a note from our ancestors, you boil the bones from good quality meat you've eaten for a prolonged period, up to 24 hours even, and use that as broth for soups, quinoa, rice etc or to drink on its own. I recommend using a slow cooker or pressure cooker to speed the process up and cut down on the bone broth smell in your house. Honestly, I don't make bone broth enough myself due to the size of my kitchen so these gummies come in handy! For more on how to make bone broth check out this post

These gummies use grass-fed gelatin. Gelatin contains two amino acids that are typically lacking in our diets, glycine and proline. Glycine in particular is important for healthy skin, nails, hair, as well as connective tissue. A good source of grass-fed gelatin is from Great Lakes which you can order online. 

Tips: You can use any kind of frozen fruit you want and adjust the quantity of lemon to make it a little less sour for your kiddies or you. Store in the fridge for up to a week.  

Ingredients:

  • ¾ cup lemon juice (or a mixture of lemon and water for a less sour taste)
  • 1 cup frozen mixed berries (or just strawberries or raspberries)
  • 3 tablespoons honey
  • ¼ cup grass-fed gelatin 

Directions:

  1. Place lemon juice and frozen berries in a blender and blend on high until completely mixed. Pour into a saucepan.
  2. Add the honey and gelatin and whisk together. You will have a thick paste. Turn the heat on low, and continue to whisk the mixture for 5-10 minutes, until it becomes thin and everything is mixed. Take off the heat.
  3. Pour into small baking dish (or fun silicone holds!). Set in the refrigerator for at least 1 hour to firm up.
  4. Remove from the fridge and cut into bite-size squares. Otherwise, remove gummies from their molds and enjoy!

Please don't eat too many at first as they could be a little difficult for your belly to get use to! Do you have a favourite gummy recipe? If so, I'd love to hear about it.

In health & happiness, 

Dr. Karen

p.s Want more support for your body using food? Join me for my Annual Spring Cleanse coming up April 26th-May 6th! 

Food Friday: Singapore Noodles

This past weekend I was craving a noodle dish but wanted something other than my usual spaghetti and with a handful of veggies and colour. Since I am gluten free, vermicelli noodles are the perfect option for a carb heavy dish but with less calories. This dish is very simple to make and takes no more than 20 minutes to cook. It serves about 4. I’ve added a little turmeric to the original recipe for its additional colour and anti-inflammatory benefits, as well as a few more veggies. Local source, Getaway Farms or any farmers markets is a great place to find your chicken in the HRM. For those vegetarians out there, I’d probably suggest substituting with tofu for a little protein. One warning - if you have never cooked vermicelli noodles before, you may be finding noodles on your floor a week from now as they tend to fly everywhere when you break them apart! 

Ingredients:

  • 1/2 of 250g package rice vermicelli 
  • 1/2 of 424g package frozen uncooked peeled large shrimp
  • 1 skinless, boneless chicken breast
  • 2 green onions
  • 1 carrot
  • 1/2 red pepper
  • 1/4 yellow onion 
  • 2 tbsp freshly squeezed lime juice
  • 1 tbsp Braggs or tamari
  • 2 tbsp vegetable oil
  • 1 garlic clove, minced
  • 1 tsp finely grated fresh ginger
  • 2 tsp curry powder
  • 1/2 turmeric 
  • 1/2 tsp salt 
  • handful bean shouts (optional)
  • 1/2 cup chopped fresh cilantro (optional of course)
  • hot sauce (optional)

Directions:

  1. Separate noodles as best you can, then soak in very hot water for 5-10 minutes (or according to package directions). If noodles soften before you need them drain and toss with a little vegetable oil to help prevent sticking. 
  2. Meanwhile, rinse shrimp under cold running water to remove any ice crystals. Pat dry with paper towels. Cut chicken in half lengthwise, then into thin strips. Slice yellow onion into very thin rounds. Slice carrots into julienne strips (I use this, which works wonders), and thinly slice pepper. In a small bowl, stir lime juice with Braggs/tamari, 1 tbsp water and 1 tbsp oil. 
  3. Heat remaining oil in a large non-stick frying pan or wok over medium-high heat. Add chicken. Stir-fry until light golden, about 3 minutes. Add shrimp, carrot, pepper, yellow onion, garlic and ginger. Sprinkle with curry powder, turmeric and salt. Stir often until shrimp turn bright pink, about 3 minutes. Add drained noodles, then pour in lime mixture. Stir often, separating noodles as best you can, until hot and noodles turn yellow, about 2 minutes. Remove from heat and stir in green onions, bean shoots and cilantro if using. Add a little hot sauce if you want a little more spice. Enjoy! 

Is there any recipe or food you want a healthy recipe for? Let me know in the comments below! 

In health & happiness,

Dr. Karen

(This recipe was adapted from my Chatelaine cookbook.) (Photo credit: www.seriouseats.com)